Getting Started
The following instructions will help to get you playing a disc golf game and using The Discer app.
Before you can play a game, you must create a course and players for the game.
Start a New Game
1. Press the New Game button from the main menu. |
|
2. Select the course to play from the list of courses. |
If the course you want to play is not in the list, you can add it now. |
3. Press the Edit button to enter Edit mode. |
|
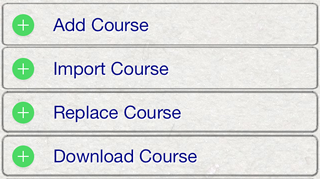
4. You can Add, Import, Replace or Download a Course.
Press the Add Course option to create a new course. |
|
Configuring a New Course
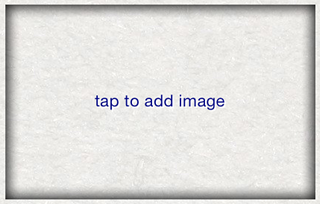
5. If you have an image of the course, tap the image area to select an image. |
|
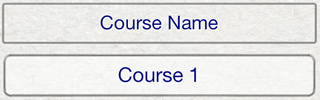
6. Enter a name for the course into the Course Name text field. |
|
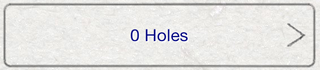
7. Press the 0 Holes button to configure holes for the course. |
|
Editing Holes
8. Press the Edit button to enter Edit mode, if not in Edit mode already. |
|
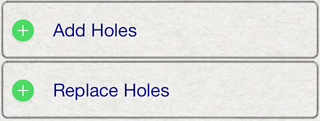
9. You can Add or Replace holes.
Adding holes will append the new holes to any existing holes in the list.
Replacing holes will replace all existing holes with the new holes.
Press the Add Holes button. |
|
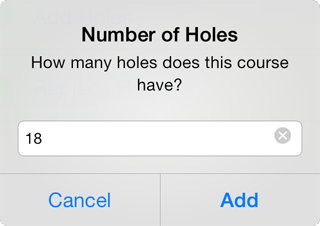
10. Enter the number of holes to create and press the Add button. |
|
11. Optionally, you can configure additional information for the holes. Default basket layouts and tees have automatically been created. For more information see Holes.
Press the back button to return to the course details. |
|
12. Optionally, enter additional information for the course, such as the address and notes. For more information see Courses.
Press the back button at the top of the screen to return to the list of courses. |
|
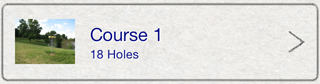
13. Select the course you created from the list of courses. |
|
Creating Players
After you have created and selected a course to play, you must create and select players for the game.
14. Press the Edit button to enter Edit mode, if not in Edit mode already. |
|
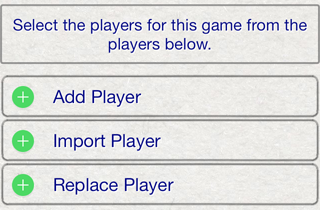
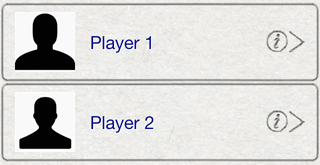
15. You have the option to Add, Import or Replace a player.
Adding a player creates a new player.
Importing a player will import a player from the documents folder and add the player to the list.
Replacing a player will import a player and replace a selected player, including all existing game data for the selected player.
Press the Add Player option. |
|
16. To add an image for the player, tap the image area. |
|
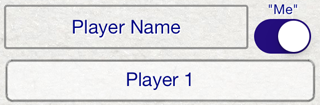
17. Enter a name for the player in the Player name text field.
If this player is You, turn on the "Me" option. |
|
18. Optionally, enter additional information for the player including handicap, disc bag, default throw type or notes.
For more information see Players.
Press the back button to return to the list of players. |
|
19. Repeat the process of adding players until all players all in the player list. |
|
Selecting Players and Setting Tee-Off Order
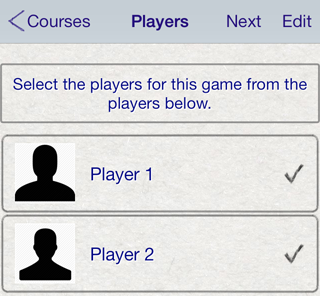
20. Select the players in the list that will be playing this game. A check will appear next to each player that will be included in the game. |
|
21. When all players are selected for the game, press the Next button to continue. |
|
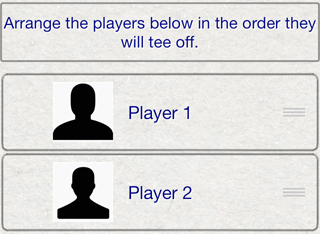
22. If there is more than one player in the game, you can rearrange the order of the players for tee off.
To move a player to a different position in the list, use the tab on the right side of the player to drag them to a new location. |
|
23. Once the tee off order is correct, press the Next button to start playing the game. |
|
Scoring the Game
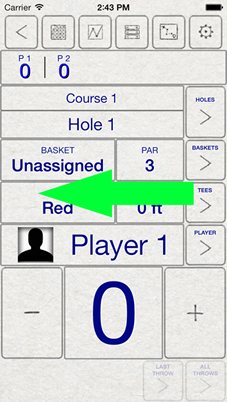
The selected course and players will be added into the Game View.
By default the first hole, and the first player will be loaded into the Game View.
The Game View displays the name of the course being played, the name of the current hole, current basket layout, current tee, hole par and distance, the current player and the current player's scores.
24. Use the Plus button to add a throw to the current player's score. Repeat this for each of the player's throws. |
|
25. Use the Minus button to remove a throw from the player's score, if necessary. |
|
26. Swipe from right to left to go to the next player in the list.
Score the next player's score in the same fashion as the first.
Repeat this for each player on this hole.
27. Swipe from right to left on the last player to advance to the next hole and return to the next player in the list.
Enter scores for each player on each hole, swiping right to left to advance through the game. |
|
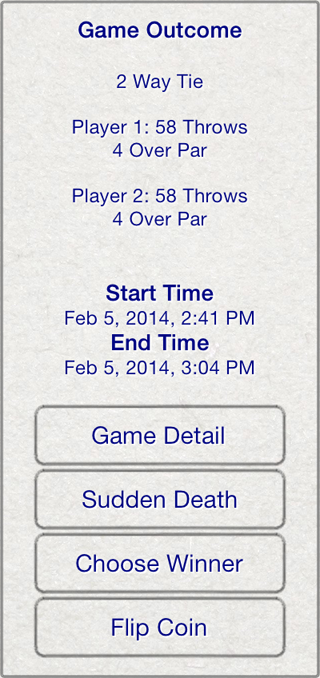
28. Swiping from right to left on the last player on the last hole will display the outcome of the game.
The Game Outcome will display the winner of the game, or the winners of the game in the event of a tie.
In the event of a tie, additional options will be displayed to help decide a winner.
Sudden Death will allow additional holes to be played to settle the tie.
Choose Winner will display a list for a winner to be chosen. This is useful if you have an alternate method to decide a winner.
Flip Coin will randomly choose a winner from the players in the tie.
For more information see Settling Ties.
Pressing the Game Details button will display a list of all holes, players and throws for the entire game.
Swiping left or right will dismiss the Game Outcome. |
|
Press the Back button to return to the Main Menu.
You can access this game in your list of played games, accessible from the Main Menu.
For more information, see Played Games. |
|
Additional Game Details
Additional aspects of your game play can be recorded using the Game View including basket layouts, tees, discs used, GPS locations of throws and more.
These features are not required for basic game scoring, but unlock many features including GPS features, mapping and statistics.
For complete details see Game View.
The Holes button will display a list of all configured holes for a course.
When a hole is selected, the Game View is loaded with the information for the hole and the currently selected player.
For more information on holes, see Holes. |
|
The Baskets button will display a list of all configured basket layouts for the currently selected hole.
When a basket layout is selected, the Game View is loaded with the par and distance for the selected basket layout. All players will display the same basket layout for a hole.
For more information on basket layouts, see Baskets. |
|
The Tees button will display a list of all configured tees for the currently selected hole.
When a tee is selected, the Game View is loaded with the current tee. A selected tee will only apply to the currently loaded player.
For more information on tees, see Tees. |
|
The Player button will display a list of all players in the game.
Selecting a player will load the Game View with the selected player and the score for the player on the currently loaded hole.
For more information about players, see Players. |
|
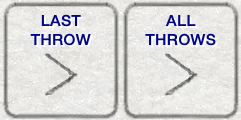
The Last Throw button will display details about the last throw to quickly allow its details to be modified.
The All Throws button will display a list of all throws for the current player's score. Any throw can be selected to allow its details to be modified.
For more information about Throws, see Throws. |
|
The Scorecard button will display the game in a classic scorecard fashion.
For more information, see Scorecard. |
|
The Statistics button will display the player's scores for the game on a graph.
For more information, see Statistics. |
|
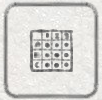
The Game List button will display the game in an alernate list view, providing a way to display all player's scores for each hole at one time.
For more information, see Game List View. |
|
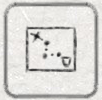
The Map button will display a map with information about the game and course, including, player, tee, basket, throw locations and more.
In order to use the map feature successfully, tees, layouts and throws must have GPS tags.
For more information, see Mapping. |
|
The Settings button will display settings for the game, including game information, type, handicap, GPS and tracking features, sharing and more.
For more information, see Game View, GPS Game Options, Tracking Direction, Game Type, Handicaps, Copy Game, Share Game, Edit Game Players. |
|
table of contents