Settings |
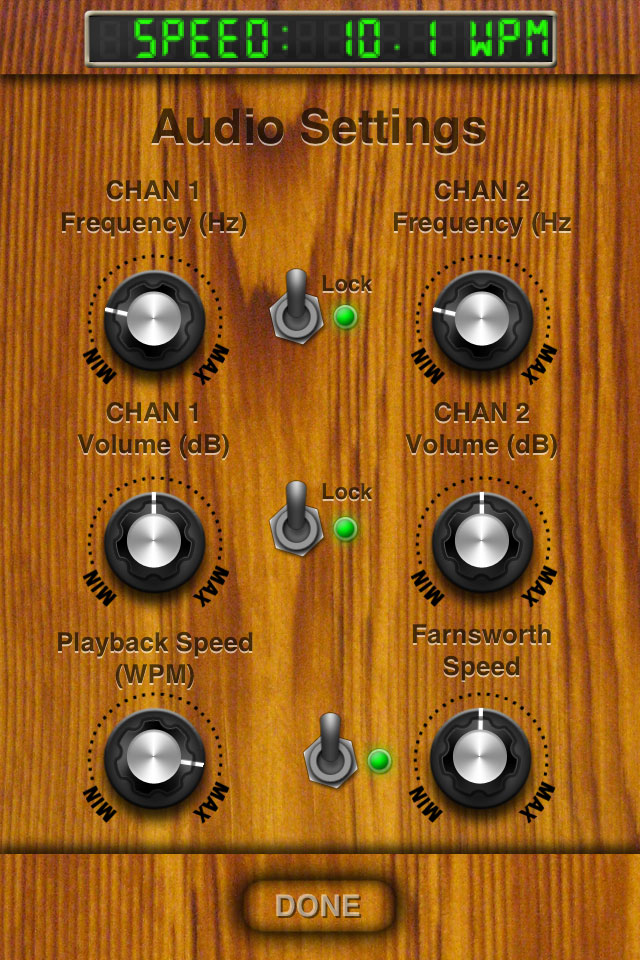
Morster SettingsThe Settings provide access to additional features and preferences that affect the appearance and behavior of Morster. To access the settings on the iPhone or iPod touch, press the SOS button at the top of the screen or the top of the notepad, then press the Settings button. To access the settings on the iPad, press the Options button at the top of the morse key. Audio SettingsThe Audio settings provide a way to change the morse tone frequency and volume, add well as playback and interpretation settings. The Frequency options for Chan 1 and Chan 2 determine the tone or tones that are played for the morse key activation sound. If the Lock switch is enabled, the frequencies for channel 1 and channel 2 will stay locked together on the same frequency. The Volume options for Chan 1 and Chan 2 determine the volume that each channel will play during morse key activation. If the Lock switch is enabled, the volumes for channel 1 and channel 2 will be locked together. When enabled, the Farnsworth speed is applied to the time between morse character sequences. Character sequences will be played at the specified playback speed, but the space between is determined by the Farnsworth speed. Note: Changing Settings with KnobsTo adjust settings that use a turntable knob, touch the knob, drag your finger away from the knob and rotate around knob. The farther through is from the center of the knob, the more resolution the knob can attain. When knobs are turned, the value is displayed at the top of the settings in a digital display.
The Morse While Typing option will automatically play morse characters as they are typed with the keyboard. Visual Morse Style OptionThe Visual Morse Style section of the settings determines the appearance and behavior of the visual morse feature.
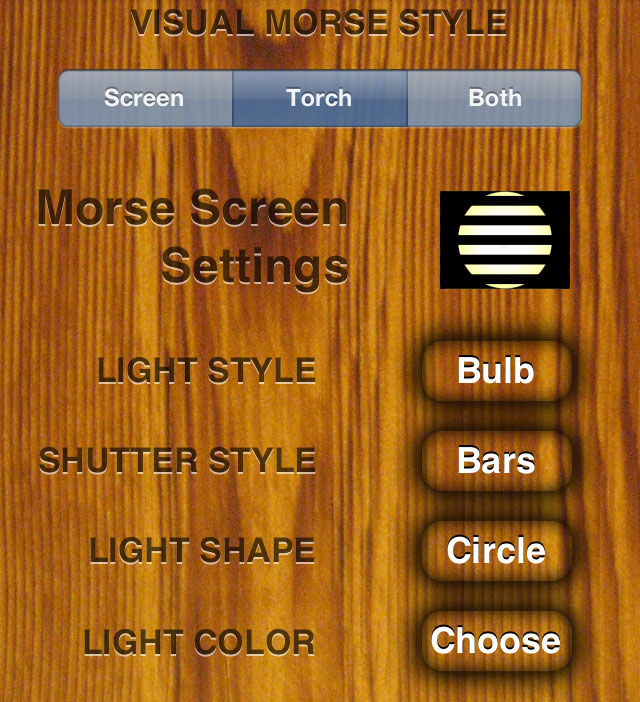
The first setting in the Visual Morse Style section is the Screen/Torch/Both option. Screen: The screen will be used to flash morse code sequences. Torch: The LED for the forward facing camera will be used to flash morse code sequences. Both: The screen and the LED will both be used at the same time to flash morse code sequences. The following settings pertain to the screen visual morse feature. At the top of the section, a preview is available to show what the morse screen will look like. The Light Style setting determines whether a color is used or whether an image of a light bulb is used. The Shutter Style option determines whether a shutter effect is used when the morse screen flashes. The possible values are Shutters or None. The Light Shape option determines the shape of the morse screen. The possible values are Circle or Rect. The Light Color option determines the color of the light when the Light Style setting is set to Color.
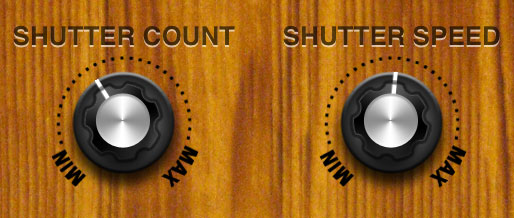
The Shutter Count option determines the number of shutters that are used when the Shutter Style is set to Bars. The Shutter Speed setting determines how fast the shutters open and close when the Shutter Style setting is set to Bars. The Shutter Speed values range from 80% being the slowest shutter speed and 10% being the fastest speed. The value indicates the percentage of a dot character duration as indicated by the Morse Speed setting. AppearanceThe Appearance section of the settings contain options that affect the appearance of the morse code in the note pad.
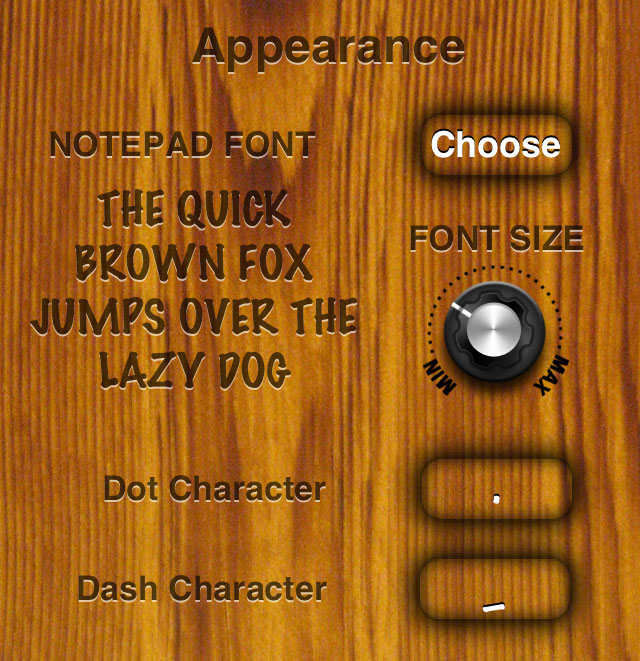
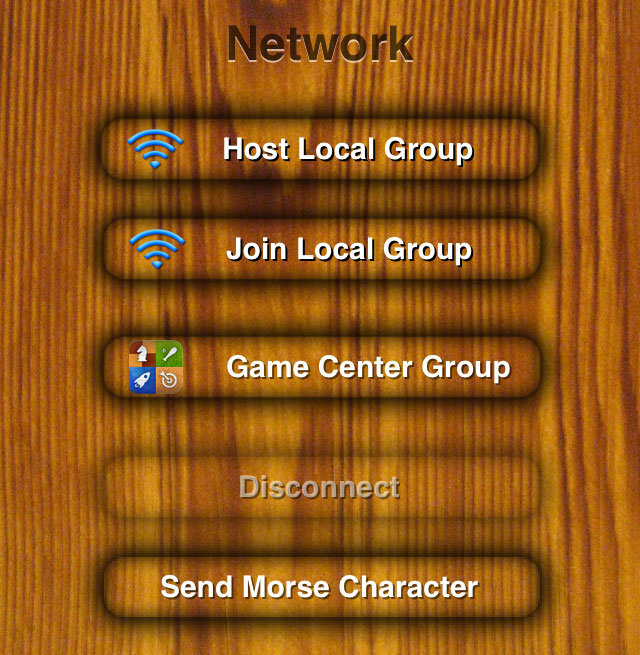
The Notepad Font option determines the font that is used for the notepad. Press the Choose button to select from a list of available fonts. The Font Size option determines the size of the font displayed in them morse notepad. A 'Quick Brown Fox' sample shows the current font configuration. The Dot Character option is used to select the character that is displayed in the notepad that represents a morse dot character. The most common value for this would be a period (.). The Dash Character option is used to select the character that is displayed in the notepad that represents a morse dash character. The most common value for this would be a hyphen (-) or an underscore (_). To select a character to use as the dot or dash character, press the button that is showing the current character. Use the keyboard to press the new character to use. These settings will only apply to morse code entered after the setting change. Network SettingsThe network section is used to establish morse code groups either locally using wifi or blue tooth, or using Game Center.
The Host Local Group option is used to start hosting a morse code group on a local network using wifi or using blue tooth. Other devices can then join the group and communicated using morse code. The Join Local Group option is used to join a group that is being hosted by another device in the same network using wifi, or using blue tooth. Note: Selection of wifi or blue tooth is done automatically by the device. To force the devices to connect using a specific method it may be necessary to disable the other communication method on at least one of the devices. The Game Center option is used to establish a morse code group using Game Center. The Disconnect button is available when connected to a morse group. Pressing this button will disconnect from the group. The Send Morse Character/Send Letter/Send Key Up/Down option is used to determine what kind of information is sent. If set to Send Morse Character, every dot and dash is sent to the group. If set to Send Letter, only complete alphabetical letters are sent. If set to Send Key Up/Down, ever time the morse armature key is pressed, it will be sent to the group. Note: Sending Key Up/Down will send the most information and has the most potential for error. The transcription is done on the receiving device and is subject to the receiving device’s settings. This feature effectively makes receiving devices act in sync with the sending device as if it was a remote. |