Text styles can be appplied to the entire script, or to ranges of text. To learn how to apply styles to the entire text content, see Changing Font.
This document shows how to change ranges of text in the script while editing.
1. Display the settings by pressing the Settings button. ![]()
2. Enable editing the text by setting the Edit Text switch to ON. ![]()
3. Scroll to the location in the script with the text content to edit.
4. Select a range of text to change the style.
Note on Selecting Text You can select a word in the script by double-tapping the word. You can adjust the selection by dragging the blue beginning and ending selection indicators. |
|---|
5. Use the text formatting bar to apply text qualities to the selected range of text.
![]()
6. The font and size for the selected text is displayed in the format bar in the selected font.
7. Use the Line button to adjust the line spacing. ![]()
Using slider controls The Line, Size and Indent options all use the same slider and button controls to change the setting. This control will appear over all other formatting controls.
1. Drag the slider to the right to increase the value and to the left to decrease the value. 2. Use the minus (-) button to decrease the value, use the plus (+) button to increase the value. 3. Use the Close (X) button to dismiss the slider when finished changing the value. |
|---|
8. Use the Preset button to display the list of text presets. This can be used to create text presets or apply existing text presets. See Text Presets for more information on using presets. ![]()
9. Use the Font button to display a list of fonts on the device. Select a device from the list will apply the font to the selected text. ![]()
10. Use the Size button to change the size of the selected text. A slider and buttons will appear over other formatting controls. ![]()
11. Use the Underline button to add or remove an underline from the currently selected text. ![]()
12. Use the Indent button to change the indent for the selected text. This setting will affect entire lines with selected text. ![]()
13. Use the Align Left button to align the text to the left. This setting will affect entire lines with selected text. ![]()
14. Use the Align Center button to align the text to the center. This setting will affect entire lines with selected text. ![]()
15. Use the Align Right button to align the text to the right. This setting will affect entire lines with selected text. ![]()
16. Use the Text Color button to display a color picker to change the text color. ![]()
17. Use the Text Background Color button to display a color picker to change the text background color. ![]()
18. Use the Find button to display a search and replace feature for the script. To learn more about finding text, see Finding Text. ![]()
How to use the color picker:
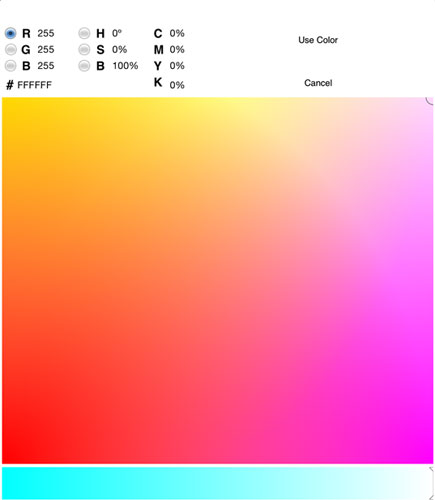 |
Using the Color Picker1. Touch anywhere in the gradient area to select a color. 2. Adjust the color slider as needed. 3. Choose the color picker type, Red, Green, Blue, Hue, Saturation, or Brightness. 4. Values for RGB, HSB and Hex can be entered directly. 5. Press the Use Color button to commit the color. 6. Press the Cancel button to close the color picker and not commit the color. |
See Also: